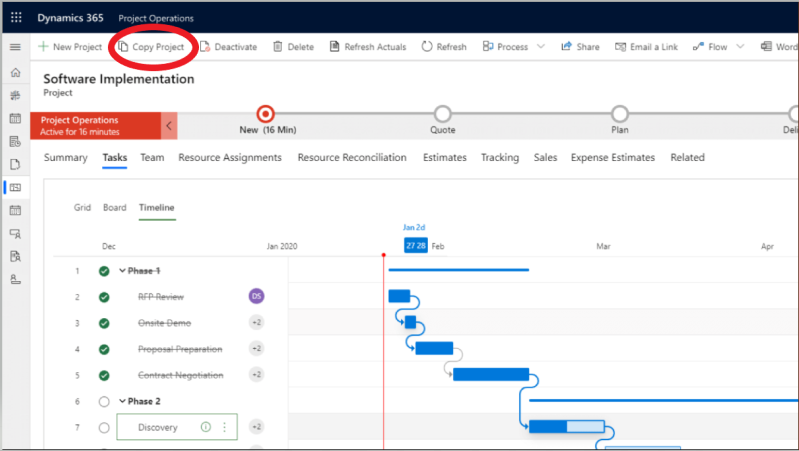
Open XrmToolBox and connect to your Project Operation, Install flow visio builder plug-in
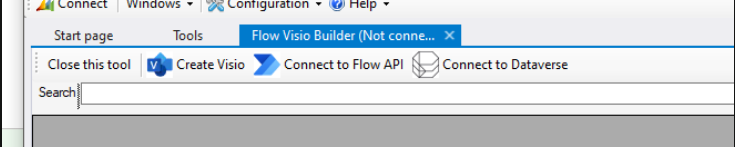
look for the process you want to create visio file for and click on Create visio and install your process flow in visio format.
TOP 1 CRM BLOG
Open XrmToolBox and connect to your Project Operation, Install flow visio builder plug-in
look for the process you want to create visio file for and click on Create visio and install your process flow in visio format.
Go to solutions and open the entity that contains the field you want to make read only and click on Business Rules and Click New.

The Business Rule designer window opens with a single condition already created for you. Every rule starts with a condition. The business rule takes one or more actions based on that condition
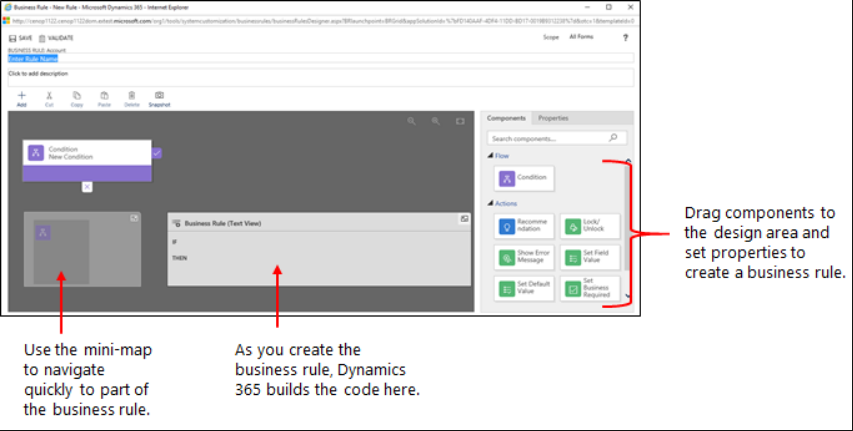
Add a description, if you want, in the description box in the upper-left corner of the window.
Add conditions. To add more conditions to your business rule:
a. Drag the Condition component from the Components tab to a plus sign in the designer.

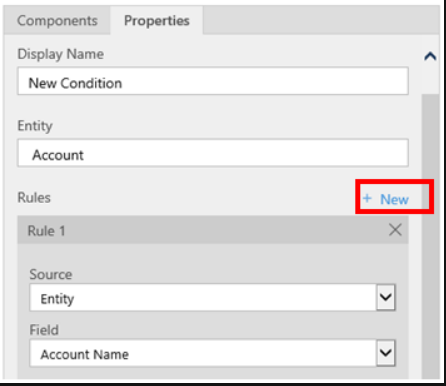
b. To set properties for the condition, click the Condition component in the designer window, and then set the properties in the Properties tab on the right side of the screen. As you set properties, an expression is created at the bottom of the Properties tab.
c. To add an additional clause (an AND or OR) to the condition, click New in the Properties tab to create a new rule, and then set the properties for that rule. In the Rule Logic field, you can specify whether to add the new rule as an AND or an OR.
d. When you’re done setting properties for the condition, click Apply.
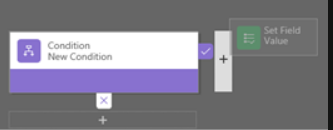
Add actions. To add an action:
a. Drag one of the action components from the Components tab to a plus sign next to Condition component. Drag the action to a plus sign next to a check mark if you want the business rule to take that action when the condition is met, or to a plus sign next to an x if you want the business rule to take that action if the condition is not met.
b. To set properties for the action, click the Action component in the designer window, and then set the properties in the Properties tab.
c. When you’re done setting properties, click Apply.
To save the business rule, click Save on the action bar.
To activate the business rule, select Activate on top of the screen.
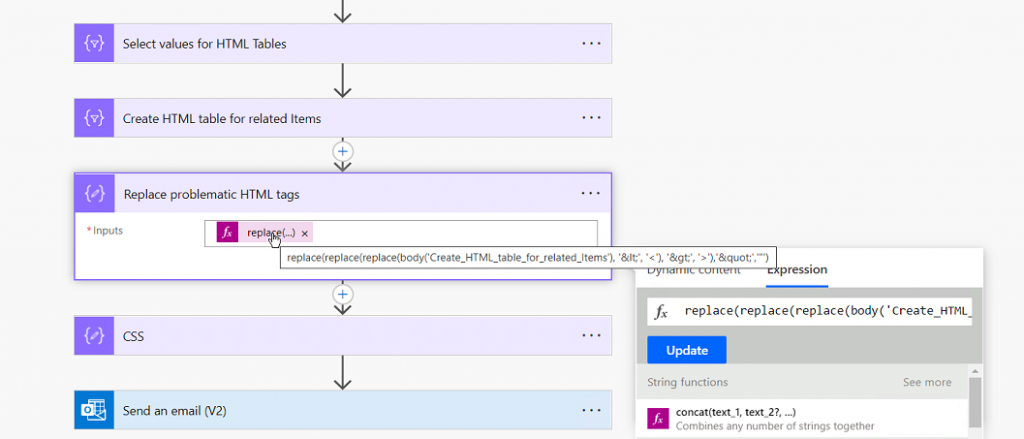
When you create a work flow and face a problem with the output is displaying HTML code like the image below:

there are multiple ways you can use to fix this issue. One of the solutions is using the expression Replace in your flow to replace the HTML code seek the example below:
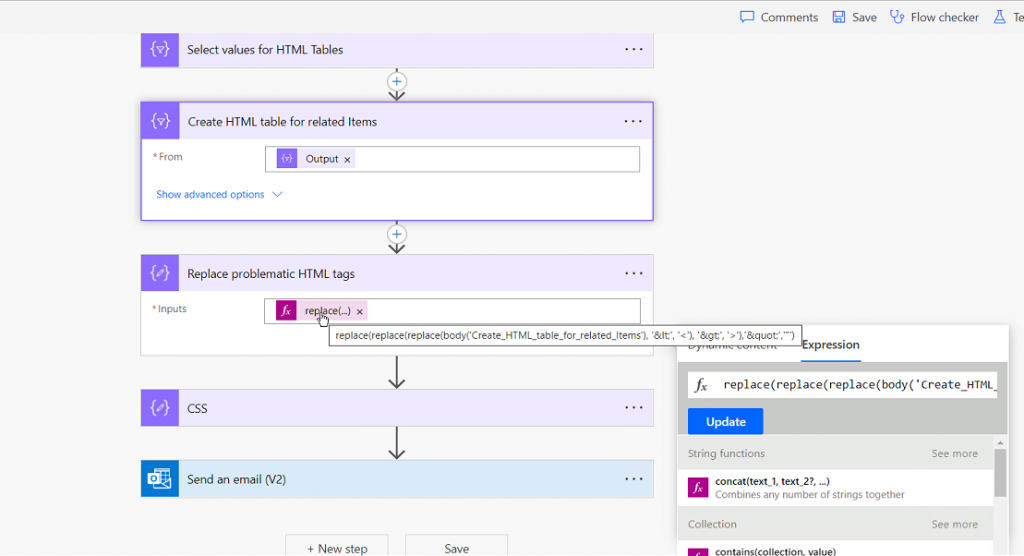
the expression used in this example is: replace(replace(replace(body(‘Create_HTML_table_for_related_Items’), ‘<’ , ‘<‘ ), ‘>’, ‘>’), ‘"’, ‘ ” ‘)
after that add the output of your expression inside the CSS compose
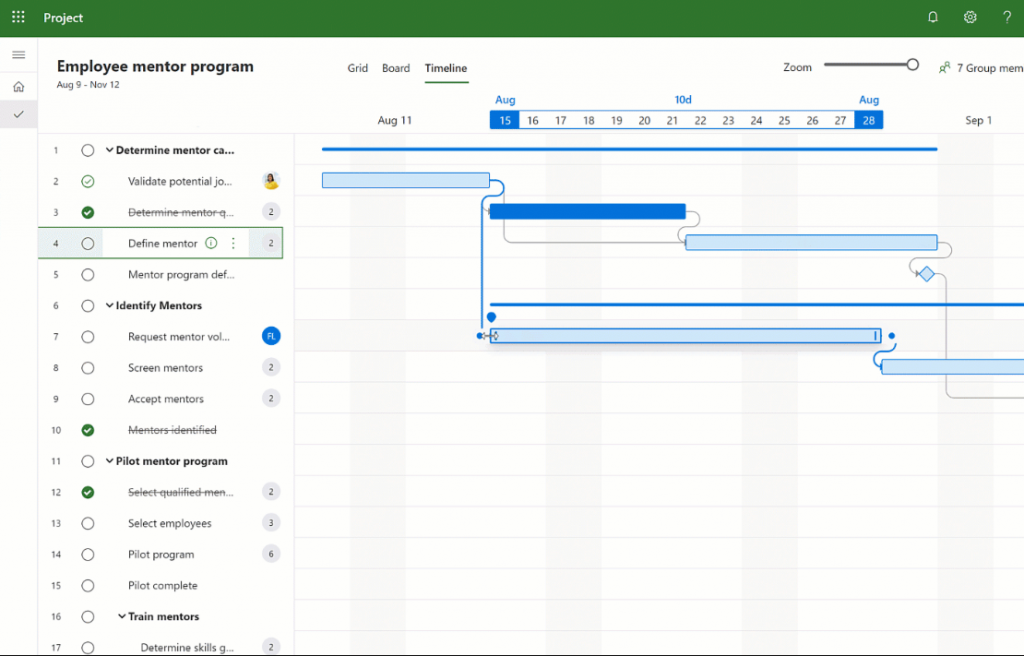
To Integrate your created tasks in Ms Project inside the tasks tab in Power Automate you have to clone your Ms Project template.
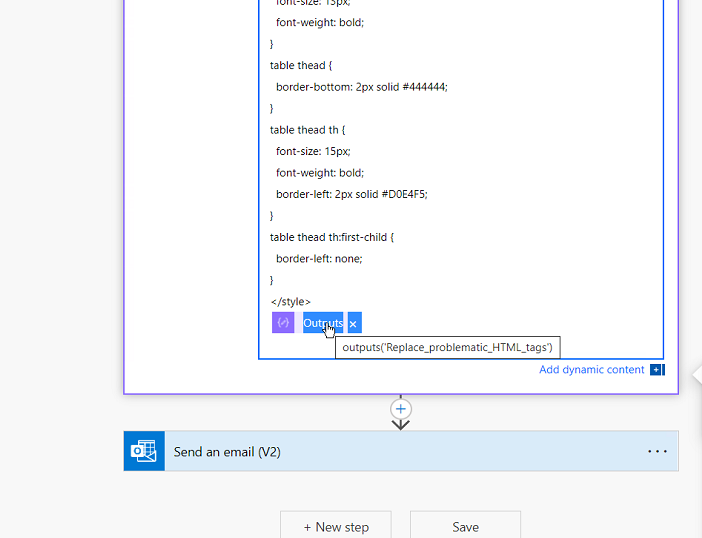
To add styling to your email notification you have to create a compose action in your flow

and then place your CSS inside the action

Finally place output of compose CSS and output of the created HTML table

the function used in this example is: replace(replace(replace(body(‘Create_HTML_table_for_related_Items’), ‘<’ , ‘<‘ ), ‘>’, ‘>’), ‘"’, ‘ ” ‘)
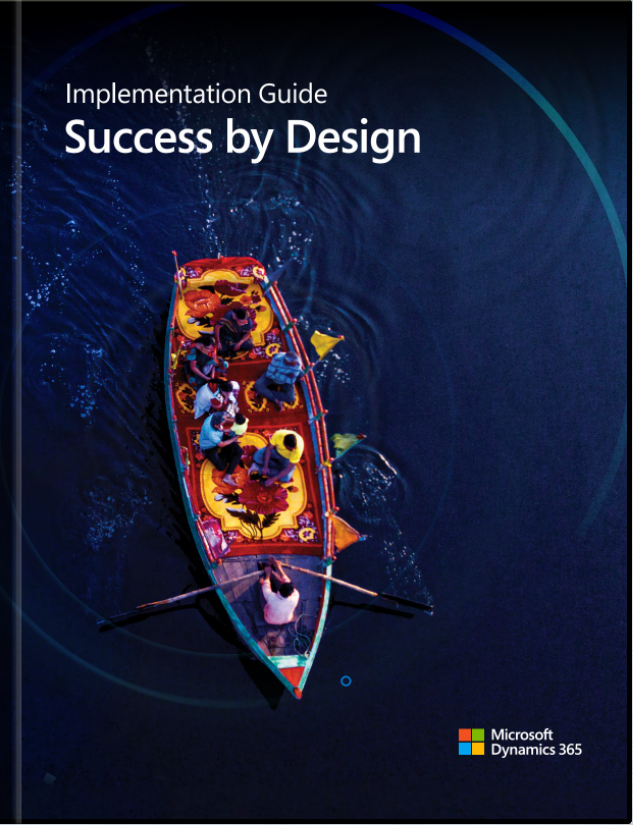
In case someone hasn’t seen yet “Dynamics 365 Implementation Guide”. It is 706 pages book, but it is interesting and worth reading. Our top one part is about security and how Microsoft Dynamics 365 is protecting users.
Dynamics 365 Implementation Guide (d365implementationguide.com)

Unified Interface in Dynamics 365 looks great, not so much white space like in current UI. The thing is, I just hope it won’t break anything in existing UI.
The challenging plan behind Unified Client Interface/Infrastructure “UCI” is to bring a single client technology to cover all the different UI’ s across many devices, Outlook, Web Mobile, …. – fingers crossed!
Please click on following screenshots to enlarge them.


Microsoft Dynamics 365 and eBECS can help you move your business to the Cloud. The webinar will be about benefits of moving to the cloud. You can learn how:
You can register to this event using following url:

CRMBOOK published by PowerObjects can be useful for CRM users on different level of experience with this product. It also covers many topics from previous versions of Dynamics CRM e.g. 2011, 2013 to show for example how a navigation was changing to improve user experience.
The content of this book covers topics ranging from the basics to the more advanced questions about CRM administration and extending as well.
The idea with online book is really great, especially when Dynamics CRM is chaining so often and we experience so many releases, updates,…
PowerObjects decided that they would not bother with print and publish an online book that could be easily maintained – reallygood point.