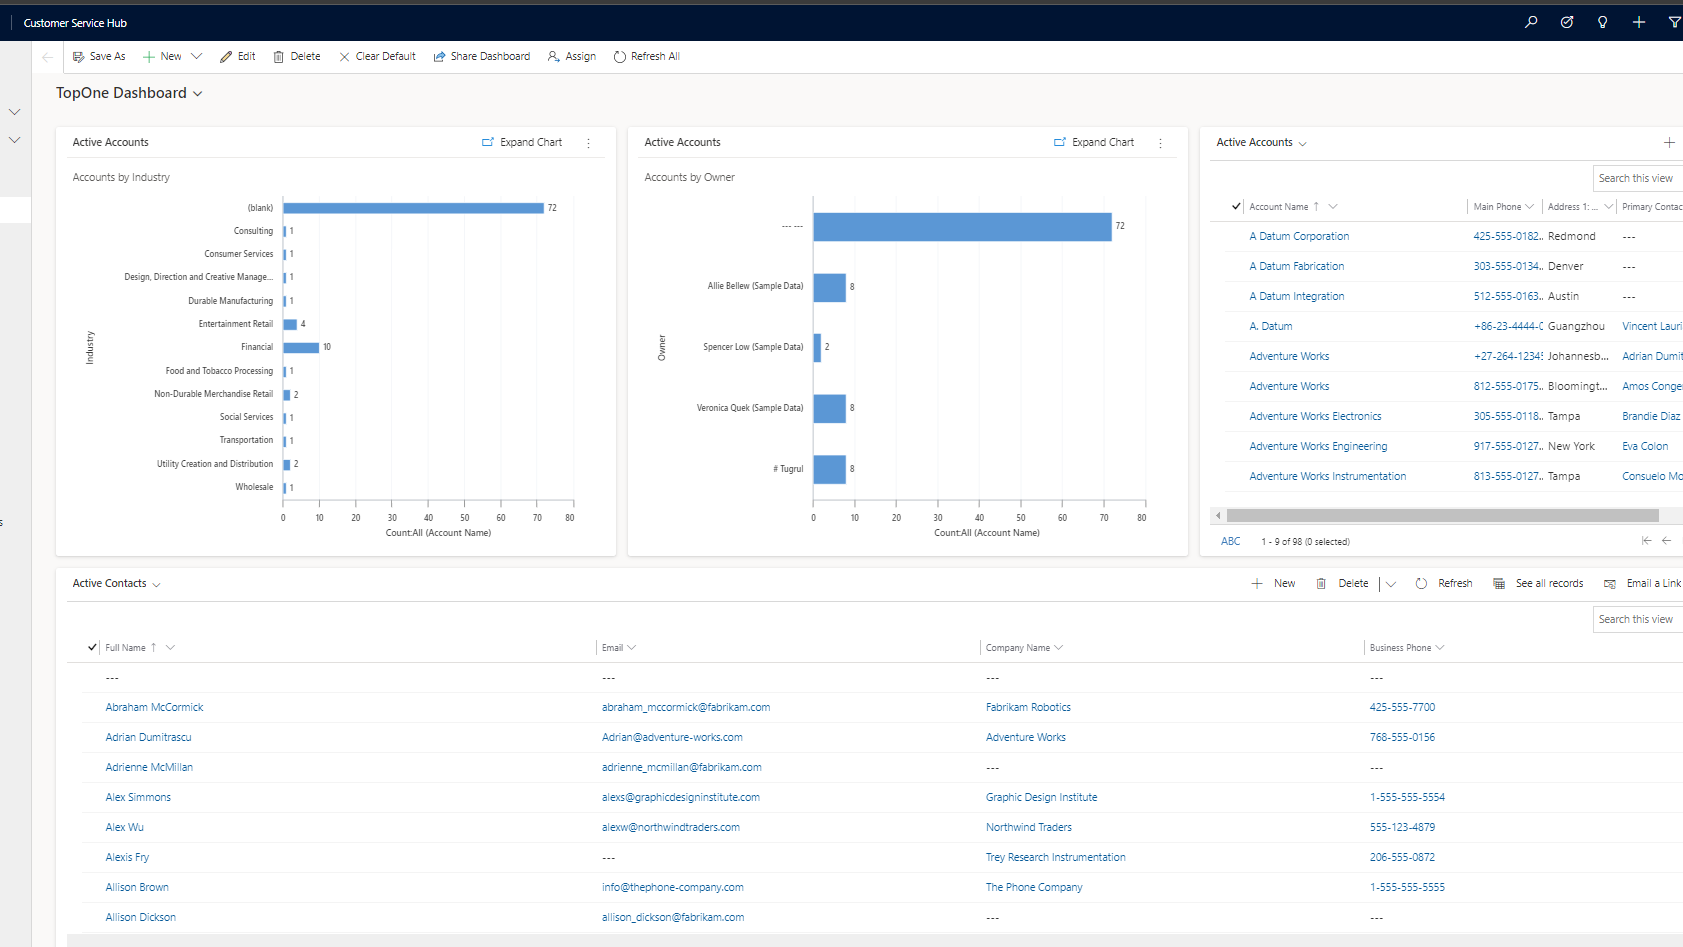
This quick guide is to show users how to create their custom dashboards on Dynamics 365 and how to switch quickly between different dashboards. The image below displays a custom dashboard created by us. It demonstrates the different type of data that can be displayed on a dashboard.

How to view different dashboards:
On the top left of the dashboard there is a dropdown menu which displays all of the pre configured dashboards created by default. When users create their own dashboards they’re also stored here.
Creating new dashboard:

On the header of the dashboard page we can see a bar which looks like the image above. On that bar click on new and select “Dynamics 365 Dashboard”.

You’ll be prompted to pick your desired layout, there are a few pre-sets but these can be configured after being created. Once selected users will see a new pop-up on their screen with a template of the layout chosen.

From this layout editor users are free to add and remove elements from their dashboards. The example above shows the 3-column regular dashboard. Users can insert charts, lists, assistants, Iframe and web resources into any of these blocks. The layout editor also allows to remove blocks, change positions and even increase/decrease the height and width of the blocks (some blocks need to removed for this). Once users are happy with their layout they can save the changes and close the window. Now everything has been set we can go to the drop down menu on the top left and select our dashboard which will have the name the user has set on the layout editor.
