Windows 10 Quick Assist to remotely troubleshoot PC problems

Quick Assist is a remote assistance tool that allows Windows 10 users to receive and give assistance by taking control of a remote computer.

How does Quick Assist Work?

The person giving assistance and who will be taking over control of the computer is called the Helper.

If you are running Windows 10 and the Fall Creators Update is installed, Quick Assist is already installed by default. To start the program, simply click on the Start Button and type Quick Assist into the search field.

Starting Quick Assist

When you start Quick Assist, you will be greeted by a prompt asking if you wish to Get assistance or Give assistance.

Give or Receive Assistance

If you are the Helper you would click on Give assistance and be prompted to login to your Windows account. Once you login, you will be shown a code and how long its good for. This code is used by the person getting assistance, or Host, to make a connection back to you. For the Host, when you click Get assistance you will be prompted to enter a code given to you by the person helping you.

Give Assistance Screen
Get Assistance Screen

Left: Get Assistance Screen (Host), Right: Give Assistance Screen (Helper)

Once you have followed the steps above the Host will see a final prompt asking if they’d like to share their screen with the Helper. Accept this and the helper will now have access to your machine and control it from their own computer, which is great for troubleshooting. However please make sure the Helper is someone you know or a trustworthy troubleshoot company.

RPA in a day (Day1)

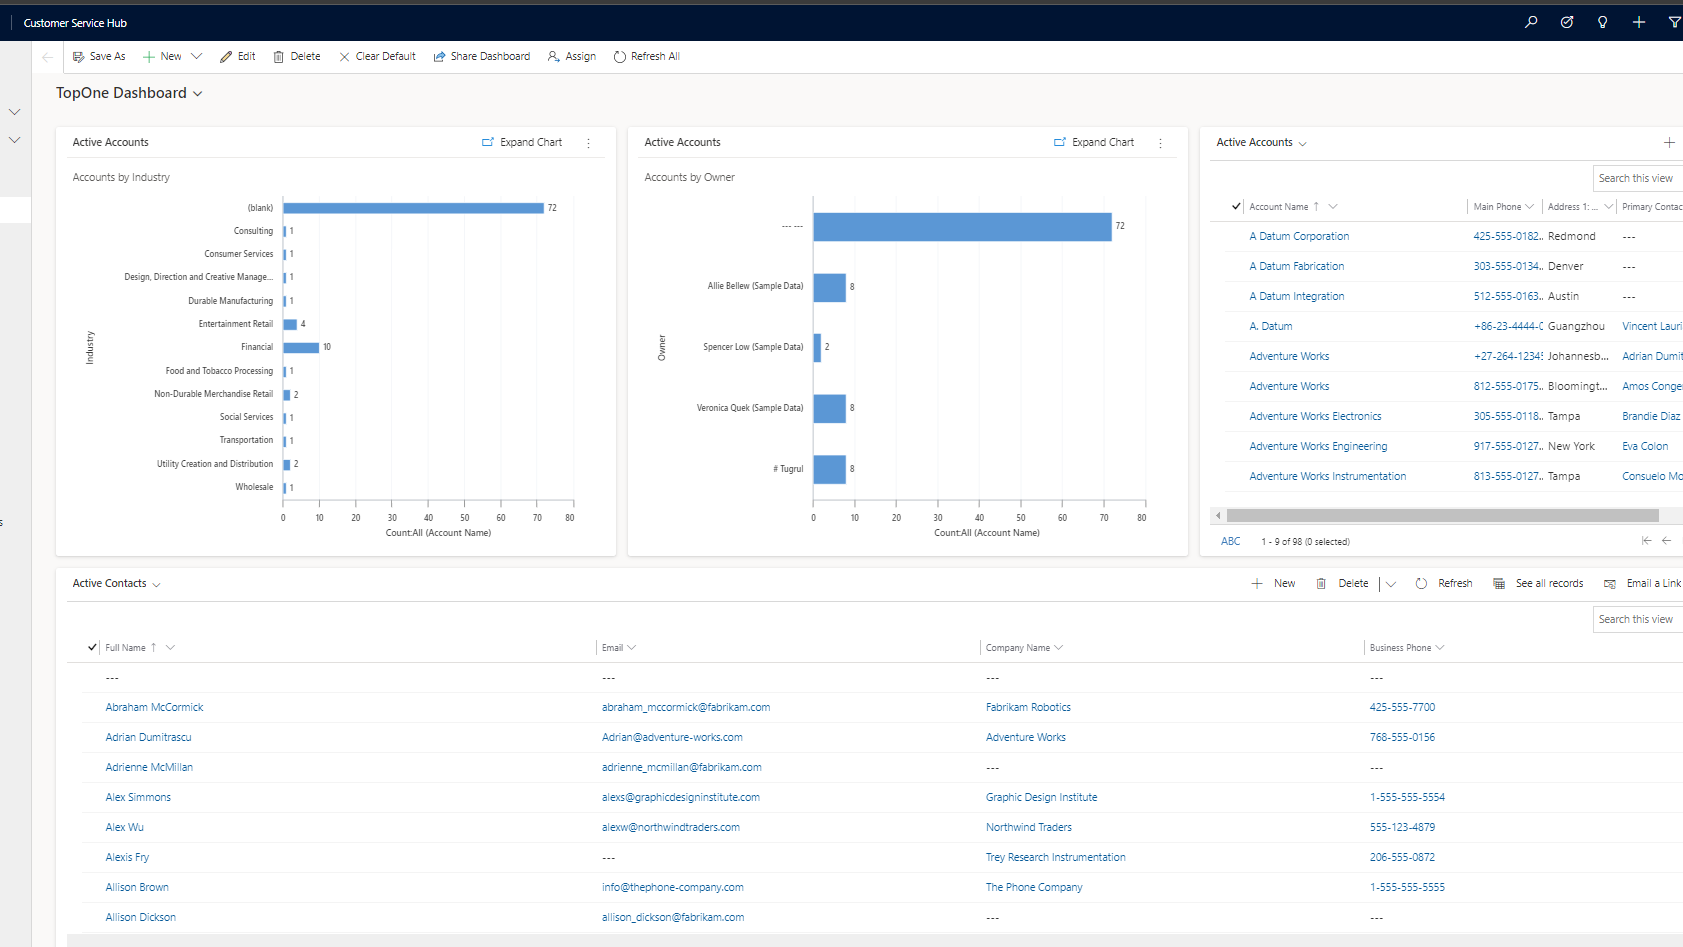
In the RPA in a Day Workshop, I learned step by step how to process incoming invoices via a modern end-to-end solution with the aid of RPA. The workshop will introduce you to Power Automate functionalities that facilitate this (The future of work: no-code automation), such as User Interface (UI) flows and APIs. In addition, I benefited from the models for processing forms, created with AI Builder. 

Robotic Process Automation (RPA) refers to process automation technology (think “software robot”) that aims to replicate the actions of a human interacting with a software application or system. An example of a software robot performing the task of a human, would be the entering of data into an ERP system.

The workshop is structured as follows: 

 Lab 1: The basis of UI flows 

  • Create your first UI flow
  • Use input and output parameters
  • Use UI flows in Power Automate via connectors (cloud) and gateways (on premises)

Lab 2: Hyper Automation Integration 

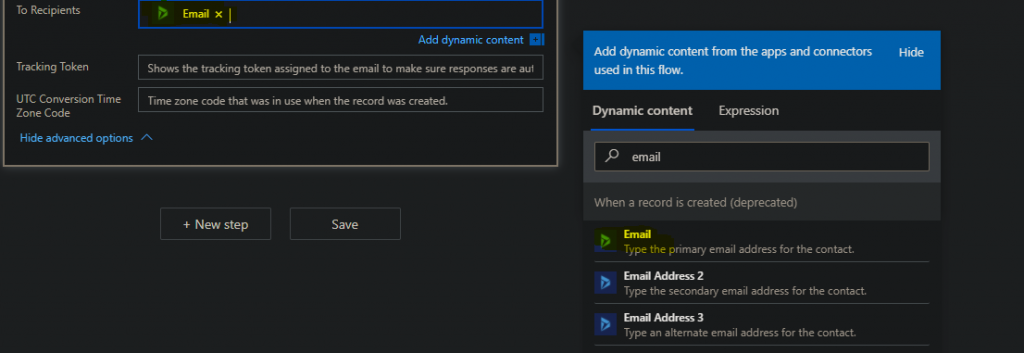
  • Connect with Outlook (integrate with the Outlook connector)
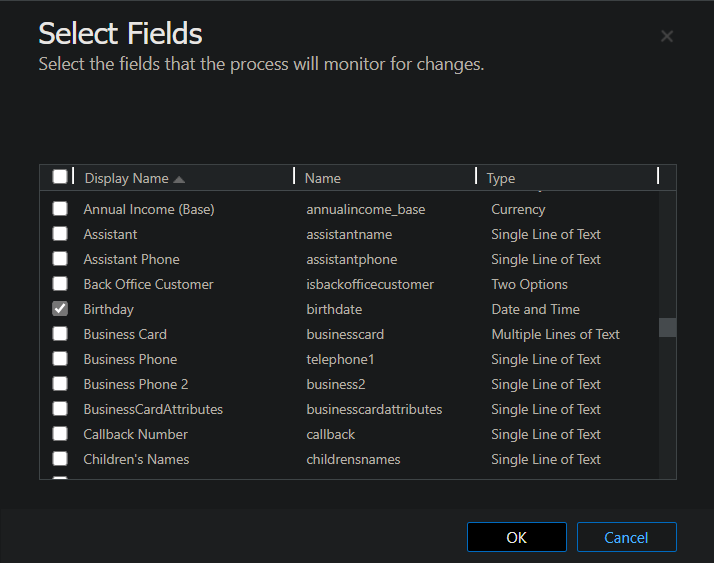
  • Integrate with AI Builder (simple use of AI for invoice processing)
  • Integrate with Teams (use the Teams connector and Adaptive Cards)

Lab 3: Use of WinAutomation in Power Automate 

  • Use Win Automation in Power Automate (automation via desktop and the web) 
  • At the end of the RPA in a Day Workshop, I was able to set work with RPA and the creation of UI flows by means of Power Automate. 
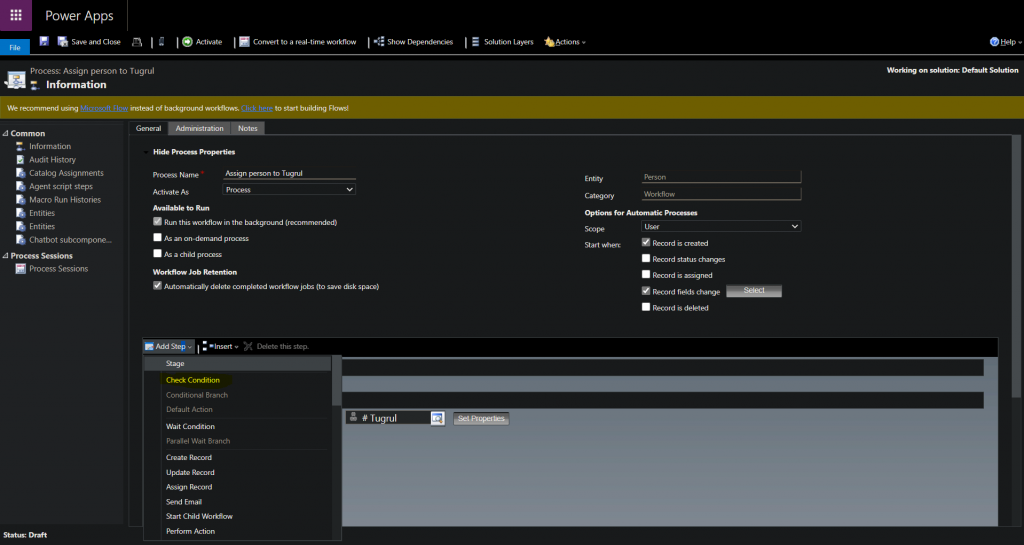
  • Use Power Automate capabilities such as UI flows and API connectors to automate a business process
  • Take advantage of form processing models developed in AI Builder

RPA in a day overview (Day3)

Top 5 reasons why Microsoft’s RPA Toolset inside Power Automate is amazing:

One: “Automation for All”

The goal of Microsoft’s Power Automate tool is to allow developers and non-developer users to leverage RPA by creating automated workflows across apps that do not have APIs or other connectors. They are using a record and play-back experience that captures a user’s actual steps, via interface actions like clicks, keyboard input, etc., making it easy to capture workflow and activity.

Looking ahead into 2020, Microsoft will be able to provide RPA capabilities for unattended UI automation as well.

Two: Lots of Pre-built Connectors

Microsoft’s UI flow offers over 275 pre-built connectors to the most popular user and enterprise applications like Salesforce and Workday. Plus, it’s easy to connect to cloud and on-prem data via a data gateway and over 10 gateway connection types. This allows on-prem data sources to be used as part of automation that’s conducted in the cloud.

Microsoft’s Power Automate enables RPA features for both modern applications with APIs or legacy applications with incomplete or missing APIs; even combining legacy apps, modern apps, and manual processes in single automation.

Three: Process Discovery Agent

One of the most challenging aspects of automation that we see is helping clients discover and focus on the processes that could be automated. Microsoft has partnered with FortressIQ to create a process discovery agent that can identify which processes could benefit from RPA and highlight where an organization is spending the most time and energy. This could be invaluable in corralling all the potential automation use cases that we can, then, help a client assess their value and impact for prioritization in their automation roadmap.

Four: 100% Cloud-Based

UI flows is 100 percent cloud-based and uses the same low/no-code experience that millions of people are familiar with in Microsoft’s Power Automate. Clients can automate repetitive tasks performed through a browser or the user interface of their Windows applications.

Five: Security via Azure

Power Automate is built on and powered by Azure, using the same services and infrastructure, as well as the same Azure directory integration, which enhances cybersecurity for RPA-driven automation.

Our RPA team is enthusiastic about Microsoft’s foray into RPA and the potential these new capabilities bring for our clients who wish to capitalize on the features of Power Automate:

  • Automate in a single platform across apps and services that don’t have APIs
  • Customize, build, and manage UI flows scripts in a secure cloud environment
  • Leverage a low-code experience with a step-by-step record and play back experience
  • Seamlessly integrate UI automation with API-based automation by combining UI flows with regular flows

Why use Microsoft Flow?

Microsoft flow helps you to simplify your day to day repetitive tasks to flows, that can run or execute automatically without much manual intervention.

If you are a little familiar with Dynamics 365 processes or out of box workflows, where we usually configure actions for a repetitive task.

We will create a basic flow which will email new contacts created in Dynamics from the administrator confirming the contact has been created.

Step 1: Access Microsoft flow directly from this URL: https://flow.microsoft.com

Step 2: Or if you have an Office 365 subscription, you can directly access Power Automate or flow from the Office 365 App launcher.

access microsoft flow

Step 3: On the left hand of the screen we can navigate to “My flows” and select “New Flow” and from this dropdown menu we select “Automated cloud flow”.

Step 4: You will see a prompt window like below, we can set the flow name to test. From this window, we can search “dynamics” and select the following “flow trigger”“When a record is created”.

Step 5: Now we can select the entity’s from our Dynamics 365 which we would like to select to help automate our task. In the example below I have selected “People” and “Email Messages”. This is so when a new Person (People) is created we would like to send an email to the new contact confirming a Contact has been created. Once we have the correctly selected organisation and entity we can now click on the drop-down menu “Show advanced options”.

Step 6: Now we can select the sender of the email, which will be the First Name. This will include the name of the sender which the contact will see in the automated email that will be sent to them.

Step 7: Now we have to set the recipient of the Email. This will be email that is entered upon creation of the contact in Dynamics. It is set so every new entry in contacts will look for the email and send it to that address.

Step 8: Finally we can test our Flow by selecting test on the top right of the screen. Here we can select manual test and create our Contact in Dynamics 365. Once the contact is created with an Email we will see a Succeeded message on our test, and if expanded it should list the email entered when Contact is created.

Dynamics 365 Resources

Resource 1: D365 Local User Groups – Microsoft Dynamics 365 local User Groups are in-person quarterly meetings that are open to Microsoft Dynamics 365 users.

Resource 2: Microsoft Docs – Learn new skills and discover the power of Microsoft products with step-by-step guidance. Start your journey today by exploring our learning paths and modules.

Resource 3: Cloud Perspectives – Official blogs about Microsoft services that give insight on current or new technologies.

Resource 4: Virtual Events Hub – A centralised view of Microsoft Community Virtual events – By the Community for EVERYONE!

Resource 5: #PowerAddict – An individual with an almost obsessive need and desire to bring positive change, solve problems and automate processes with the Microsoft Power Platform. Watch this short video to learn more about the #PowerAddicts global community.

Overview of Microsoft Exam MB-200

The purpose of this exam is to test an individuals capability to accomplish the following technical performing tasks:

  • Perform discovery, Planning and analysis:
    • Create and Validate Documentation (Microsoft Documentation: Create a Validation Formula and Message.
    • Perform continuous collaboration with customers (Microsoft Documentation: Collaborate with your team).
  • Manage user experience design:
    • Create and configure apps (Microsoft Documentation: Create or edit an app by using the app designer).
    • Create and configure templates.
    • Create and manage processes (Microsoft Documentation: Create and manage inherited processes).
  • Manage entities and data:
    • Modify an existing data model (Microsoft Documentation: Modify models and mappings to generate documents that have application data).
    • Import and export data (Microsoft Documentation: Import and Export Data with the SQL Server Import and Export Wizard).
    • Manage data.
  • Implement security:
    • Configure security in Office 365 (Microsoft Documentation: multi-factor authentication).
    • Configure security settings (Microsoft Documentation: security defaults).
  • Implement the integration:
    • Configure App for Outlook (Microsoft Documentation: Deploying Outlook for iOS and Android app configuration settings).
    • Configure email integration (Microsoft Documentation: Connect to Exchange Online).
    • Integrate with Office 365 (Microsoft Documentation: Microsoft 365 integration with on-premises environments).
    • Create, configure, and maintain Power Automate flows (Microsoft Documentation: Create a flow by using Dynamics 365 (online))
  • Perform solutions deployment and testing:
    • Manage environments (Microsoft Documentation: Create and manage environments in the Power Platform admin center).
    • Manage applications apps (Microsoft Documentation: Application management documentation).
    • Perform system administration.
    • Perform quality assurance.
    • Manage solutions.

Key Learning Objectives 

To successfully pass the Exam MB-200: Microsoft Power Platform + Dynamics 365 Core, it is highly important to understand the exam objectives:

  • Perform discovery, planning, and analysis (5-10%)
  • Manage user experience design (20-25%)
  • Manage entities and data (15-20%)
  • Implement security (5-10%)
  • Implement integration (15-20%)
  • Perform solutions deployment and testing (25-30%)

Exam Overview

The exam includes 40-60 questions. The questions will appear in the form of multiple-choice. The candidate will get 120 minutes to complete the exam, in total, they get 120 minutes.

Import solutions in Dynamics 365 CRM

This blog post is a quick walkthrough on how to import solutions to Dynamics 365.

Step 1: Navigate to Advance Settings | Settings | Solutions.

Step 2: Select the necessary solutions and export the ones you wish to import to another instance. (Make sure they’re unmanaged)

Make sure to click on the export button

Step 3: Navigate to the instance you wish to upload your exported solutions.

Step 4: Repeat Step 1.

Step 5: We can now select the import button where you will be prompted to upload your zip file downloaded from Step 2.

Make sure to click on import button.

Step 6: Because we are importing unmanaged solutions we will be given an extra prompt. This prompt is only to warn you that an unmanaged solution, the customizations are written to the system like you have done them manually. This means after uninstalling an unmanaged solution, nothing happens. All customizations are still in the system. This is helpful to transfer your customizations but may offer problems if you would like to roll back to the state before you installed the solution.

importing unmanaged solution prompt warning.

How to create a workflow in Dynamics 365

This post will show you how to create a simple workflow using Dynamics 365.

In this example I will be creating a workflow where I will check to see if a person is over the age of 18, if this is true the person will be assigned to contact Tugrul (which is me).

Step 1: First we need to navigate to our Dashboard and go to the advanced settings which are located on the top right-hand side of the window.

Step 2: From the advanced settings window we can navigate to the Processes page from the drop-down menu.

Step 3: From the Processes window we can see all of the previous process created by default alongside any custom ones we may have created ourselves. We can now click on +New on the top left to create our own process. A prompt will appear on the screen which will ask us to fill in the necessary details. From the image below you can see the details, I have filled in to create our workflow.

Create new process
Processes prompt

Step 4: The first thing to do once we have created our process is to check the ‘Records field change’ under ‘Start when’. You can then click on the ‘View’ and select the relevant record we will like to set a listener on which in my case is birthday.

Select Birthday record

Step 5: Once we have selected the relevant fields it is now time to ‘Add Step’ and select the ‘Check Condition’ step so we can set our if statement to check if a person is under the age of 18.

Add step check condition

Step 6: We can now add our if statement which will select the entity Person, select Birthday field, add Greater Than clause and finally select current date to see if Person is <18.

Specify condition

Step 7: Once we have specified our conditions we can now save and Activate our process.

Activate process

Step 8: Finally we can check if our process is working by creating a new contact with a relevant date of birth or change a person date of birth who already exists in our database. We can check this by going to our processes and on the left-hand side selecting Process Sessions.

If everything goes well you should be able to see the status as succeeded and it will show whether the user was assigned correctly or not.

How to create new entities in Dynamics 365 ?

The objective of this post is to demonstrate the steps needed in order to create new entities in Dynamics 365.

Step 1: Navigate to Settings | Customizations

How to create an Entity in Microsoft CRM
Step 1

Step 2: Click on the Solutions tab. Select TopOneEntities solution to create an entity.

Step 2

Step 3: Click on Entities, then on the command bar, click New as shown below or you can select a pre-existing one

Step 3

Step 4: Enter the Display Name and Plural Name that will be used for this entity throughout Microsoft Dynamics 365.

Also, select the area that displays this entity, this will be dependent on which services you need this entity to show up on. Finally, once all changes are made be sure to Publish any changes made otherwise the changes will not take effect.

Step 4

Step 5: In the Ownership list, select one of the following:

User or Team. Records for this entity can be owned by individual users or by teams. Security can be defined according to the business unit with which the current owner is associated. For example, contact records are set to User or Team.

Organization. Records for this entity are used for reference by all Microsoft Dynamics 365 users. Individual users or teams can’t own these records. For example, product records are set to Organization.

Finally click on Save button and the publish button so all changes take effect.

How to create a custom dashboard on Dynamics 365 ?

This quick guide is to show users how to create their custom dashboards on Dynamics 365 and how to switch quickly between different dashboards. The image below displays a custom dashboard created by us. It demonstrates the different type of data that can be displayed on a dashboard.

Example of custom dashboard

How to view different dashboards:

On the top left of the dashboard there is a dropdown menu which displays all of the pre configured dashboards created by default. When users create their own dashboards they’re also stored here.

Creating new dashboard:

Header

On the header of the dashboard page we can see a bar which looks like the image above. On that bar click on new and select “Dynamics 365 Dashboard”.

Choose layout prompt

You’ll be prompted to pick your desired layout, there are a few pre-sets but these can be configured after being created. Once selected users will see a new pop-up on their screen with a template of the layout chosen.

Layout editor

From this layout editor users are free to add and remove elements from their dashboards. The example above shows the 3-column regular dashboard. Users can insert charts, lists, assistants, Iframe and web resources into any of these blocks. The layout editor also allows to remove blocks, change positions and even increase/decrease the height and width of the blocks (some blocks need to removed for this). Once users are happy with their layout they can save the changes and close the window. Now everything has been set we can go to the drop down menu on the top left and select our dashboard which will have the name the user has set on the layout editor.